How to Get One Consistent Voice Across All Your AI Clips (Full Guide)
Ori Silver
·
Co-founder, Maxfusion AI
·

If you have worked with AI videos you know this problem well. You generate a few clips, and in each one the narrator sounds like a different person. Either they switch gender or they simply sound completely different.
Every AI model does this. Seedance 2.5, Google Omni Flash, MiniMax H3, all of them.
In case you don’t want some ElevenLabs voice-over done externally, there are 2 ways to fix it: the lazy way and the pro way.
The lazy way is the Voice ID method. You lock the prompt of the specific voice and add it to every generation where that voice appears.
The pro way is the voice isolation reformation method. You carefully separate the voice from the rest of the audio, replace the voice using the audio isolator and the replace voice function, and re-layer all the audio files back together in editing.
This guide breaks down how to do each method step by step using the Maxfusion AI MCP in Claude. Everything works the same in Codex.
The lazy way: the Voice ID method
A Voice ID is a short block of descriptor lines that defines a voice completely. You design it once, and from that moment on it goes into every prompt where that voice speaks, word for word. The block never gets paraphrased or trimmed.
A full Voice ID, done right, should cover these 7 attributes:
Type of voice (smooth narrator, casual girl-next-door, movie-trailer gravitas, energetic radio DJ)
Age
Male or female
Texture (velvety, raspy, breathy, clean, gravelly)
Pitch (high, mid, low-mid, low)
Delivery character (elegant and confident, warm and intimate, punchy and urgent, calm and measured)
Recording placement (intimate close mic, big room with natural air, large hall with reverb, outside in open air)
Important: have all 7 of these in to generate the maximum consistency possible. Without them, the voices might drift between clips.
Written out, a finished Voice ID looks like this:
VOICE ID: “Mara” (narrator)
* Calm narrator voice, female, early fifties
* Clean, slightly breathy texture
* Low pitch
* Measured, unhurried delivery
* Big room with natural air
Build yours in 5 steps:
Decide who speaks. A narrator is a voice-over with no on-screen speaker. An on-screen character speaks on camera. If you have both, each one gets its own Voice ID.
Pick a value for each of the 7 attributes. Write one attribute per line, short and concrete.
Name the voice. The name is how you bind the block to a character across prompts.
Freeze the block. Once it reads right, it never changes. Consistency comes from the exact same words hitting the model every time.
Embed it in every prompt where that voice speaks. For narration, the block rides with the voice-over direction. For a character, the block attaches to that character’s description and dialogue, so the model knows this specific speaker owns this specific voice.
If 2 characters speak in the same prompt, each carries their own block. Never merge blocks into one description.
The Voice ID works with any model because it is pure prompt text, with no tools and no post-production involved. The limit is what prompting can do: the model renders a voice matching your description on every clip, so the clips sound like the same person, but each render is still a fresh performance. For most multi-clip videos that is enough. When it isn’t, the pro method gives you the literal same voice on every clip.
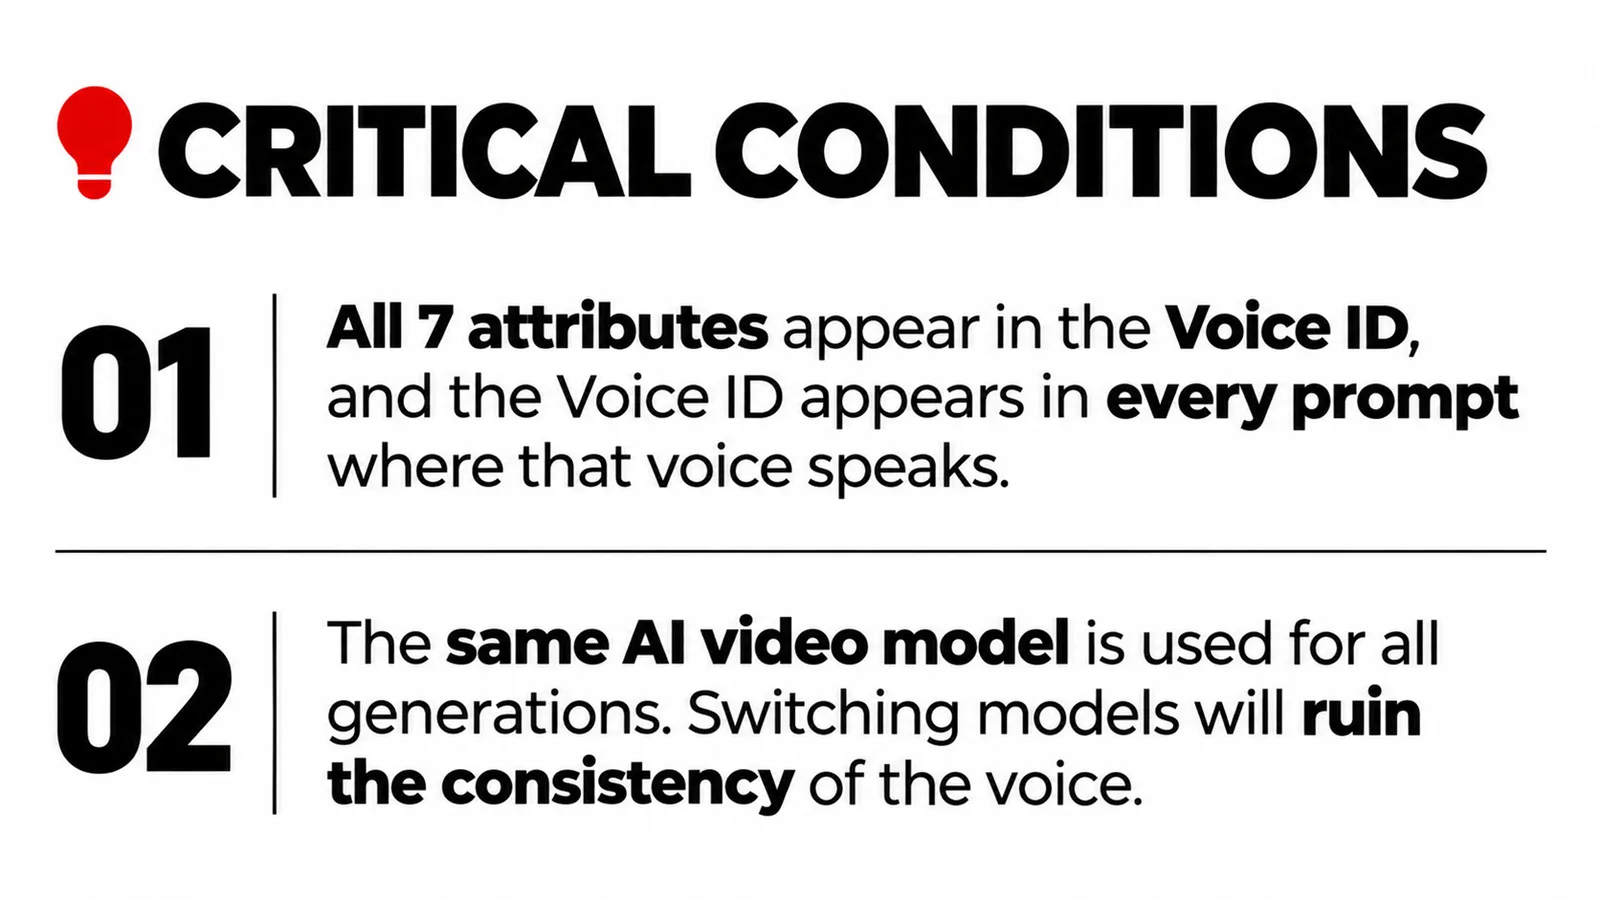
Important conditions for this to work
All 7 attributes appear in the Voice ID, and the Voice ID appears in every prompt where that voice speaks.
The same AI video model is used for all generations. Switching models will ruin the consistency of the voice.
The pro way: voice isolation reformation
The pro method relies on you having already generated all of the clips, either using the Voice ID method (and realizing some voices still sound different) or without it entirely. One important condition here: when you generate, you have to at least lock in the gender of the narrator. Replacing voices from female to male, or the opposite, yields suboptimal results.
Every replace voice function ruins the audio for a very simple reason: it overrides the entire file with the new voice. The environment acoustics get destroyed, everything sounds like a podcast, and most SFX, if not all, are erased. It sounds uncanny and usually destroys the video. This is why the pro method exists.
The fix is to separate before you replace. The full pipeline is 4 steps per clip:
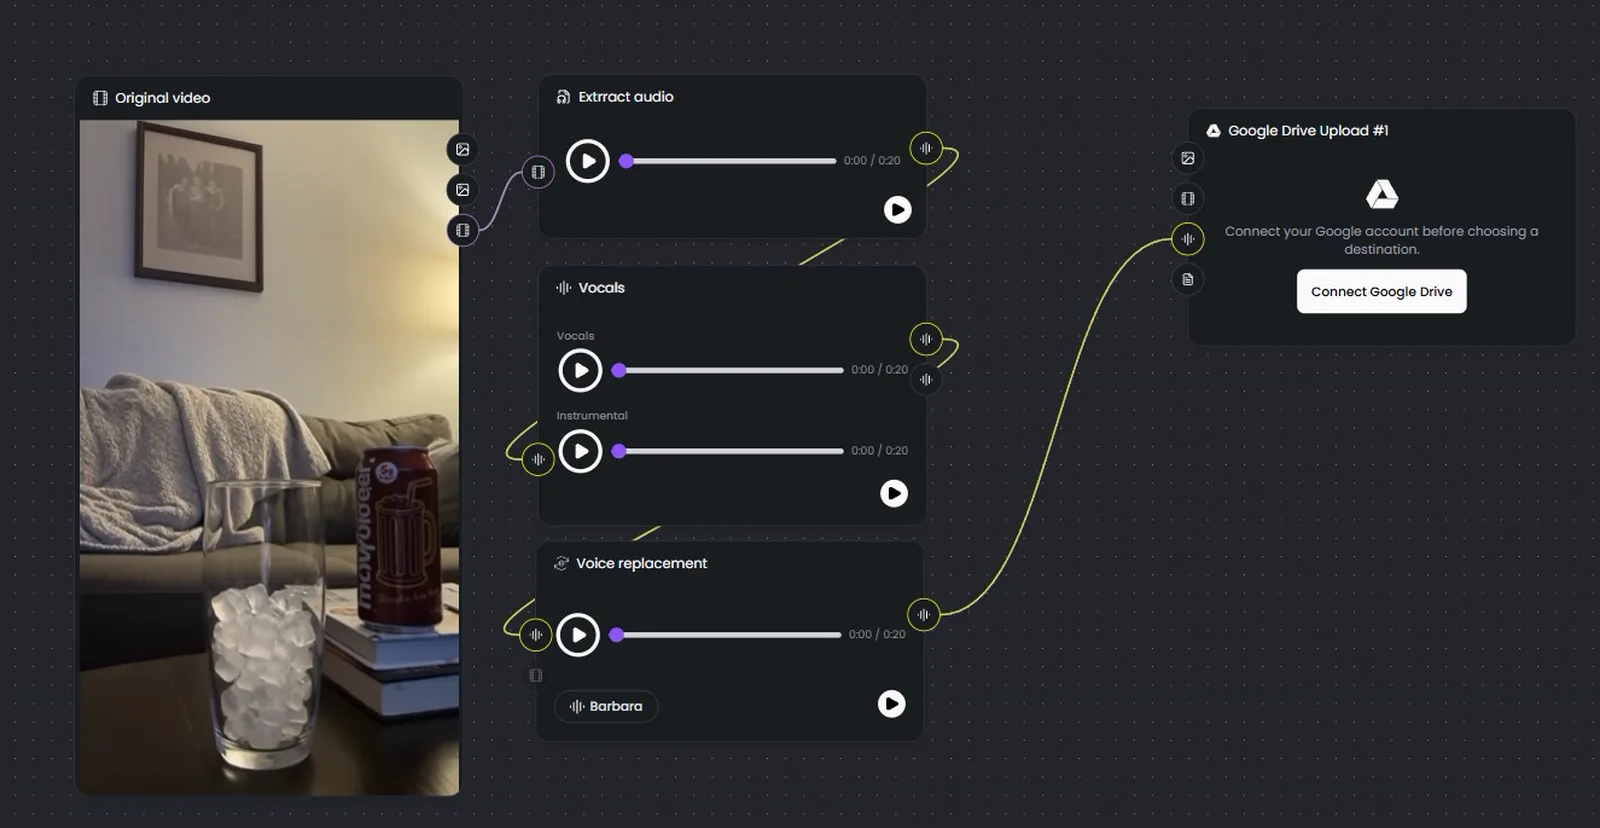
Step 1: Extract the audio
Pull the full audio track off the clip. In Maxfusion AI this is the extract audio tool, and it gives you the complete mix as a standalone audio file: voice, music, and sound effects together.
Step 2: Separate the vocals
Run the extracted audio through the audio separator. It splits the mix into 2 tracks: a vocals track holding only the speech, and an instrumental track holding the music and sound effects.
The instrumental track is now safe. You will not touch it again until the final rebuild.
Step 3: Replace the voice on the vocals track only
Take the vocals track and run voice replacement on it with your chosen target voice. This replace voice method preserves everything from the original, the tone, the delivery, and the pace, so nothing is lost. Only the voice itself changes.
Step 4: Rebuild the clip
Mute the original video and layer 2 tracks back on top of it: the untouched instrumental track and the new vocals. The result is the exact same clip, with the exact same music and sound effects, speaking in the new voice.
Run the same 4 steps on every clip with the same target voice, and the finished video has 1 consistent voice from the first second to the last.
Tip: if you don’t want to do this on separate clips, you can stitch all the clips together first, wrong voices and all, and then run the 4 steps on the entire video in one go, saving you work. Best kept for shorter and less complex ads or clips.
A video done with this method (Model Gemini Omni-Flash)
Choosing the voice
You can choose from Maxfusion AI’s own library of voices. There are hundreds to choose from.
You can connect your own ElevenLabs API key to Maxfusion and gain access to choose from your own library.
The Claude skill that runs all of it
You can choose to run all of this manually using the UI or the workflow canvas, all the tools described are available on Maxfusion, or you can use it directly with the MCP inside Claude, using a fine-tuned skill that was built especially for this purpose.
If you use the Claude skill provided here in the MCP, it will always create a new project inside Maxfusion AI for any generation. You can also choose for the editing part to happen locally and be saved on your computer when you use Claude Code.
When the run finishes, the project holds everything: your source clips, the tracks, and the finished videos. The skill then offers to save the finals locally or send them to your Google Drive through the Maxfusion AI integration.
Which method to use
Situation | Method |
|---|---|
Haven’t generated yet | The lazy way, Voice ID in every prompt |
Clips exist with mismatched voices | The pro method |
One finished video, wrong or inconsistent voice | The pro method, run once on the full file |
Need the literal same voice, not a similar one | The pro method |
Generated across different models | The pro method; a Voice ID only holds within one model |
The 2 methods never depend on each other. You can run either one alone.
Now you have 2 methods to make consistent voices across all clips, using any video model and working on any length of video.
Use the lazy method when accuracy is less crucial. Use the pro method when you need precise results with the highest quality.
You can find the skill files here.
You can find an already made canvas workflow available for you here.
And you can run it end to end inside Claude without even leaving the chat.
" height="57.25593113035147px" id="pFbN4t6nI" transform="translate(73 0)" width="138.9190010986328px"/><path d="M 58.958 24.529 L 67.611 12.149 L 59.372 0.274 L 64.067 0.274 L 70.234 9.479 L 76.217 0.274 L 80.774 0.274 L 72.58 12.287 L 81.37 24.529 L 76.723 24.529 L 70.003 15.279 L 63.375 24.529 L 58.957 24.529 Z M 44.566 24.809 C 43.479 24.811 42.396 24.671 41.345 24.394 C 40.359 24.1 39.426 23.649 38.583 23.059 C 37.789 22.45 37.131 21.682 36.65 20.804 C 36.19 19.884 35.96 18.824 35.96 17.628 C 35.96 16.248 36.205 15.082 36.696 14.13 C 37.218 13.18 37.908 12.427 38.768 11.875 C 39.627 11.323 40.624 10.924 41.759 10.679 C 42.924 10.43 44.112 10.306 45.303 10.31 L 52.437 10.31 C 52.437 8.93 52.237 7.733 51.838 6.72 C 51.47 5.708 50.857 4.926 49.998 4.373 C 49.138 3.79 48.003 3.499 46.592 3.499 C 45.786 3.493 44.982 3.585 44.198 3.775 C 43.462 3.959 42.833 4.251 42.311 4.649 C 41.79 5.049 41.406 5.585 41.161 6.26 L 36.972 6.26 C 37.187 5.156 37.602 4.22 38.215 3.453 C 38.848 2.664 39.63 2.008 40.516 1.52 C 41.436 0.998 42.419 0.615 43.462 0.37 C 44.487 0.126 45.538 0.002 46.592 0 C 50.09 0 52.575 1.029 54.048 3.085 C 55.52 5.14 56.257 7.917 56.257 11.415 L 56.257 24.532 L 52.989 24.532 L 52.759 21.448 C 52.084 22.368 51.271 23.075 50.319 23.565 C 49.397 24.047 48.402 24.373 47.374 24.532 C 46.449 24.711 45.509 24.803 44.566 24.808 Z M 44.935 21.356 C 46.469 21.356 47.788 21.111 48.893 20.62 C 50.028 20.098 50.903 19.347 51.516 18.365 C 52.13 17.383 52.436 16.186 52.436 14.775 L 52.436 13.578 L 48.156 13.578 C 47.144 13.578 46.146 13.593 45.165 13.624 C 44.183 13.654 43.293 13.778 42.495 13.992 C 41.698 14.207 41.053 14.575 40.562 15.097 C 40.102 15.618 39.872 16.37 39.872 17.352 C 39.872 18.272 40.102 19.024 40.562 19.607 C 41.053 20.19 41.682 20.635 42.449 20.942 C 43.249 21.218 44.089 21.358 44.935 21.356 Z M 0 24.532 L 0 0.277 L 3.774 0.277 L 3.958 3.177 C 4.48 2.44 5.063 1.842 5.707 1.382 C 6.381 0.922 7.128 0.58 7.917 0.369 C 8.769 0.12 9.652 -0.004 10.54 0.001 C 12.227 0.001 13.593 0.369 14.636 1.105 C 15.669 1.799 16.483 2.773 16.983 3.913 C 17.505 3.119 18.141 2.405 18.87 1.796 C 19.602 1.216 20.427 0.764 21.31 0.461 C 22.23 0.154 23.242 0.001 24.347 0.001 C 26.127 0.001 27.553 0.384 28.627 1.151 C 29.732 1.919 30.53 2.961 31.02 4.281 C 31.511 5.57 31.757 7.027 31.757 8.653 L 31.757 24.532 L 27.845 24.532 L 27.845 10.632 C 27.845 9.835 27.799 9.022 27.707 8.193 C 27.654 7.4 27.467 6.622 27.154 5.892 C 26.848 5.156 26.387 4.572 25.774 4.143 C 25.191 3.683 24.362 3.453 23.288 3.453 C 22.276 3.453 21.417 3.698 20.711 4.189 C 20.036 4.649 19.484 5.279 19.054 6.076 C 18.621 6.885 18.311 7.754 18.134 8.654 C 17.95 9.544 17.858 10.434 17.858 11.323 L 17.858 24.532 L 13.945 24.532 L 13.945 10.586 C 13.945 9.819 13.899 9.022 13.807 8.193 C 13.755 7.405 13.584 6.629 13.301 5.892 C 13.076 5.183 12.623 4.568 12.012 4.143 C 11.429 3.683 10.616 3.453 9.573 3.453 C 8.1 3.453 6.95 3.883 6.121 4.741 C 5.293 5.57 4.71 6.598 4.372 7.825 C 4.07 8.982 3.916 10.173 3.912 11.369 L 3.912 24.532 Z" fill="rgb(21, 22, 27)" height="24.80901853219235px" id="Dy5HPNSvH" transform="translate(0 18.5)" width="81.37000073242189px"/></g></svg>)
" height="32px" id="VmykzZzNe" width="32px"/></svg>)
" height="30.633213969252477px" id="w5KefWMGh" transform="translate(0 1)" width="32px"/></svg>)
" height="32px" id="KxxfrbxU7" width="32px"/></g></svg>)
" height="22.41686631528509px" id="wfz7J8dwQ" transform="translate(0 5)" width="32px"/></svg>)
" height="57.25593113035147px" id="ZNNxR3481" transform="translate(73 0)" width="138.9190010986328px"/><path d="M 58.958 24.529 L 67.611 12.149 L 59.372 0.274 L 64.067 0.274 L 70.234 9.479 L 76.217 0.274 L 80.774 0.274 L 72.58 12.287 L 81.37 24.529 L 76.723 24.529 L 70.003 15.279 L 63.375 24.529 L 58.957 24.529 Z M 44.566 24.809 C 43.479 24.811 42.396 24.671 41.345 24.394 C 40.359 24.1 39.426 23.649 38.583 23.059 C 37.789 22.45 37.131 21.682 36.65 20.804 C 36.19 19.884 35.96 18.824 35.96 17.628 C 35.96 16.248 36.205 15.082 36.696 14.13 C 37.218 13.18 37.908 12.427 38.768 11.875 C 39.627 11.323 40.624 10.924 41.759 10.679 C 42.924 10.43 44.112 10.306 45.303 10.31 L 52.437 10.31 C 52.437 8.93 52.237 7.733 51.838 6.72 C 51.47 5.708 50.857 4.926 49.998 4.373 C 49.138 3.79 48.003 3.499 46.592 3.499 C 45.786 3.493 44.982 3.585 44.198 3.775 C 43.462 3.959 42.833 4.251 42.311 4.649 C 41.79 5.049 41.406 5.585 41.161 6.26 L 36.972 6.26 C 37.187 5.156 37.602 4.22 38.215 3.453 C 38.848 2.664 39.63 2.008 40.516 1.52 C 41.436 0.998 42.419 0.615 43.462 0.37 C 44.487 0.126 45.538 0.002 46.592 0 C 50.09 0 52.575 1.029 54.048 3.085 C 55.52 5.14 56.257 7.917 56.257 11.415 L 56.257 24.532 L 52.989 24.532 L 52.759 21.448 C 52.084 22.368 51.271 23.075 50.319 23.565 C 49.397 24.047 48.402 24.373 47.374 24.532 C 46.449 24.711 45.509 24.803 44.566 24.808 Z M 44.935 21.356 C 46.469 21.356 47.788 21.111 48.893 20.62 C 50.028 20.098 50.903 19.347 51.516 18.365 C 52.13 17.383 52.436 16.186 52.436 14.775 L 52.436 13.578 L 48.156 13.578 C 47.144 13.578 46.146 13.593 45.165 13.624 C 44.183 13.654 43.293 13.778 42.495 13.992 C 41.698 14.207 41.053 14.575 40.562 15.097 C 40.102 15.618 39.872 16.37 39.872 17.352 C 39.872 18.272 40.102 19.024 40.562 19.607 C 41.053 20.19 41.682 20.635 42.449 20.942 C 43.249 21.218 44.089 21.358 44.935 21.356 Z M 0 24.532 L 0 0.277 L 3.774 0.277 L 3.958 3.177 C 4.48 2.44 5.063 1.842 5.707 1.382 C 6.381 0.922 7.128 0.58 7.917 0.369 C 8.769 0.12 9.652 -0.004 10.54 0.001 C 12.227 0.001 13.593 0.369 14.636 1.105 C 15.669 1.799 16.483 2.773 16.983 3.913 C 17.505 3.119 18.141 2.405 18.87 1.796 C 19.602 1.216 20.427 0.764 21.31 0.461 C 22.23 0.154 23.242 0.001 24.347 0.001 C 26.127 0.001 27.553 0.384 28.627 1.151 C 29.732 1.919 30.53 2.961 31.02 4.281 C 31.511 5.57 31.757 7.027 31.757 8.653 L 31.757 24.532 L 27.845 24.532 L 27.845 10.632 C 27.845 9.835 27.799 9.022 27.707 8.193 C 27.654 7.4 27.467 6.622 27.154 5.892 C 26.848 5.156 26.387 4.572 25.774 4.143 C 25.191 3.683 24.362 3.453 23.288 3.453 C 22.276 3.453 21.417 3.698 20.711 4.189 C 20.036 4.649 19.484 5.279 19.054 6.076 C 18.621 6.885 18.311 7.754 18.134 8.654 C 17.95 9.544 17.858 10.434 17.858 11.323 L 17.858 24.532 L 13.945 24.532 L 13.945 10.586 C 13.945 9.819 13.899 9.022 13.807 8.193 C 13.755 7.405 13.584 6.629 13.301 5.892 C 13.076 5.183 12.623 4.568 12.012 4.143 C 11.429 3.683 10.616 3.453 9.573 3.453 C 8.1 3.453 6.95 3.883 6.121 4.741 C 5.293 5.57 4.71 6.598 4.372 7.825 C 4.07 8.982 3.916 10.173 3.912 11.369 L 3.912 24.532 Z" fill="rgb(41, 42, 47)" height="24.80901853219235px" id="MB0beBzDo" transform="translate(0 18.5)" width="81.37000073242189px"/></g></svg>)