How to Keep One Consistent Character Across All Your AI Clips (Full Guide)
Ori Silver
·
Co-founder, Maxfusion AI
·
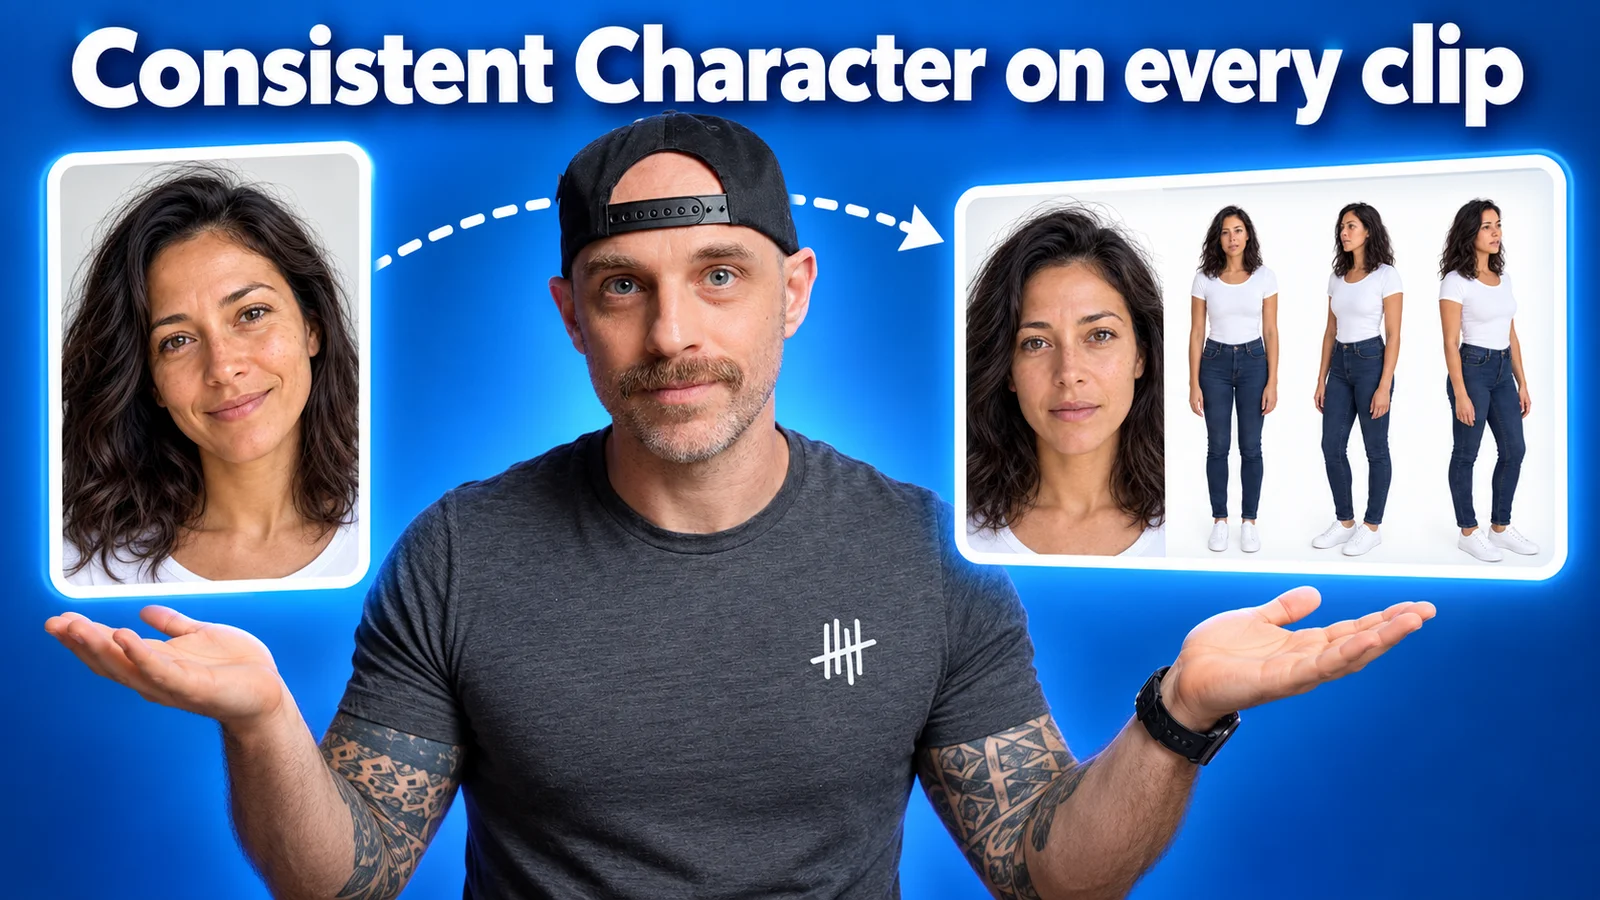
So how do you solve character consistency when you create ads with AI?
Many “AI experts” show all sort of solutions, the one that works for me without fail is the character sheet or turnaround sheet method.
In this guide you’ll learn how to prompt it, see it in action on the workflow canvas and MCP and get a free skill that does it for you.
What a character sheet is
Character sheet locks the entire look of the character from several directions to make sure that in any scene it will always look the same.
The point of the sheet is that the model sees the character from several angles instead of one. When using only one image the AI model needs to infer how the character looks from other sides or angles which leaves you open to mistakes, the AI in many cases will get certain details wrong completely and will ruin your shot, ending in more wasted credits.
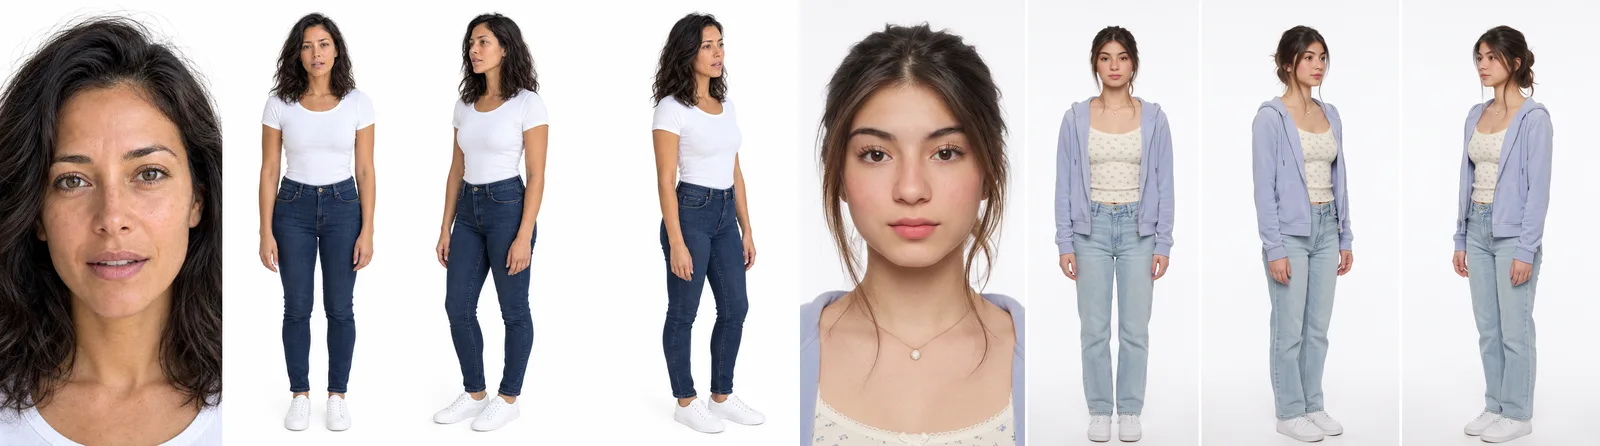
How to create your character sheet
You need two things: an image and the prompt from this guide.
Take the image of the actor or the character you want.
Give it to your Claude or ChatGPT with the instructions to fill in the specific elements from your reference image in the master prompt, or do it manually. Make sure the details of the entire look make sense, if your original actor image shows only upper half or bottom half.
Generate with your character sheet, attaching your actor image as reference. We use GPT Image 2.5 Flare for this. Nano Banana 2 is also very effective for these, it comes out really good, and it’s cheaper and faster.
Play with both and see which one works best for your character.
Important conditions for this to work
Generate at 16:9. The 4-panel row needs the width.
If you have multiple characters you should create the sheet for each.
The prompt
Using the person in the reference image as the exact identity source, create a character reference sheet on a pure white background (#FFFFFF), studio lighting, no shadows on the background. One horizontal row of exactly four panels, side by side, all the same height.
From left to right:
1. Far left: large close-up of their face and head, front-facing, filling the panel.
2. Full body shot, standing, facing the camera straight on, arms relaxed at their sides, head to shoes fully visible.
3. Full body shot, standing, body rotated 45 degrees so they face the LEFT edge of the image. Their nose points toward the left edge. The viewer sees more of the RIGHT side of their face and body.
4. Full body shot, standing, body rotated 45 degrees the OPPOSITE way so they face the RIGHT edge of the image. Their nose points toward the right edge. The viewer sees more of the LEFT side of their face and body. Panels 3 and 4 are exact mirror images of each other — they must face in opposite directions, never the same direction.
Every panel: neutral expression with mouth slightly open, relaxed lips.
Preserve their identity with 100% fidelity in all four panels — identical face across every panel: [FACE]. [HAIR]. [ACCESSORIES]. Do not beautify, do not change their apparent age, do not stylize. If the reference is cropped or partial, reconstruct the unseen parts fully consistent with the visible features and natural proportions.
Outfit in all full-body panels: [OUTFIT].
Photorealistic, white cyclorama, soft even lighting, 85mm look, no text labels, no watermarks, no grid lines, no borders between panels.
How to use the sheet
From here on the sheet replaces the original photo as your reference.
When you want to create any clip, you take the character sheet as the first reference, and the scene shot (if you have shots) as the second reference. You put them together with your clip prompt and generate. The character stays consistent across every clip, and if the sheet is in a specific style, the style carries over with it.
This works on any model that accepts image references.
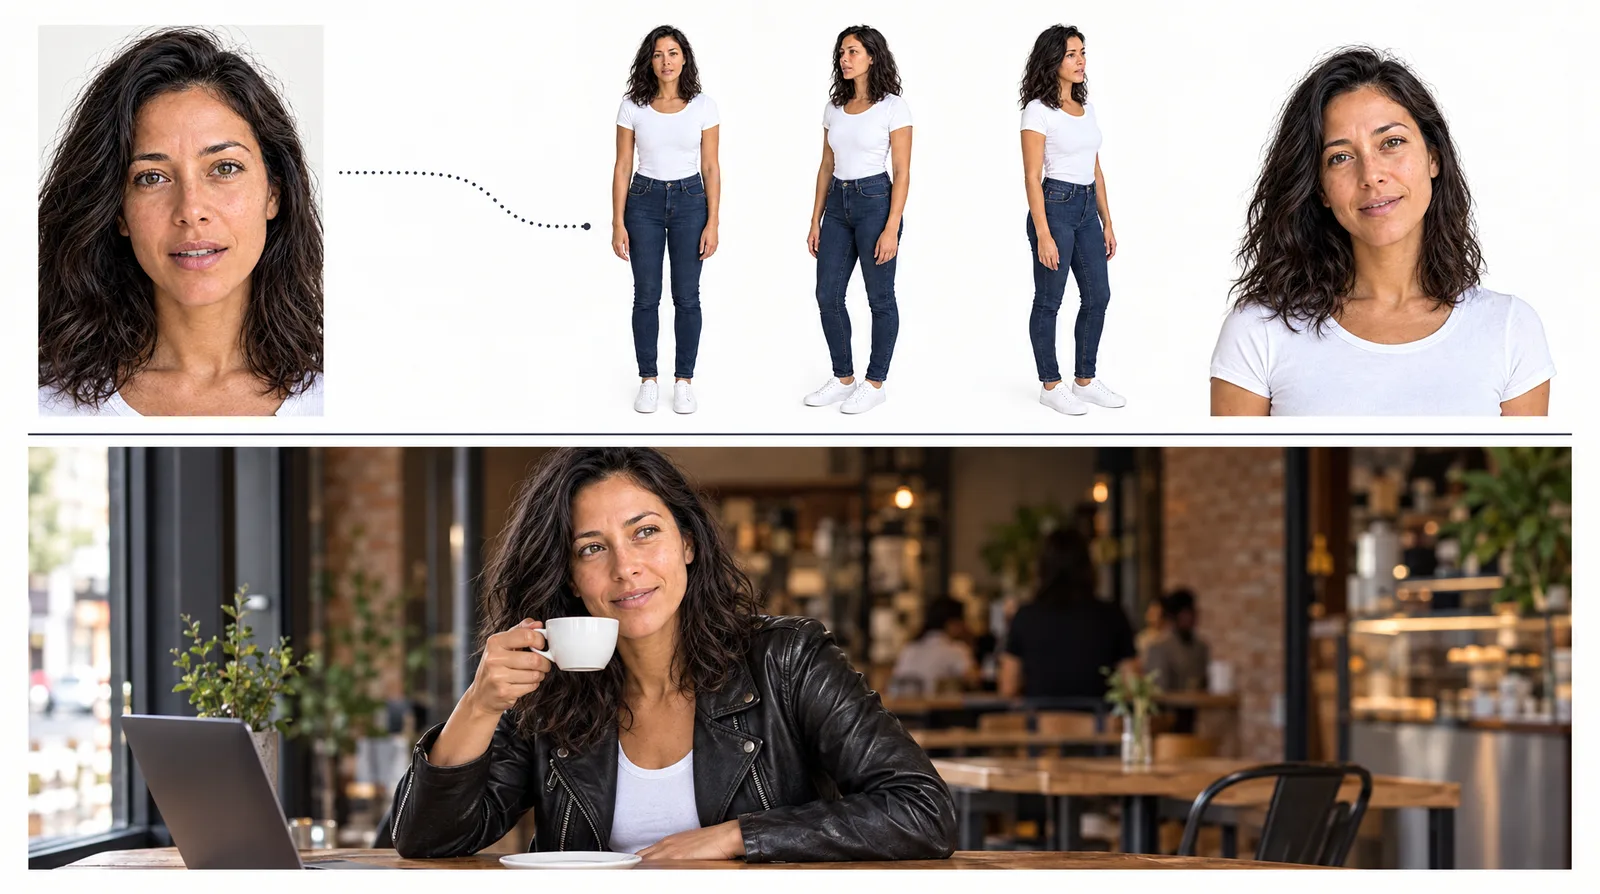
The Claude skill that runs all of it
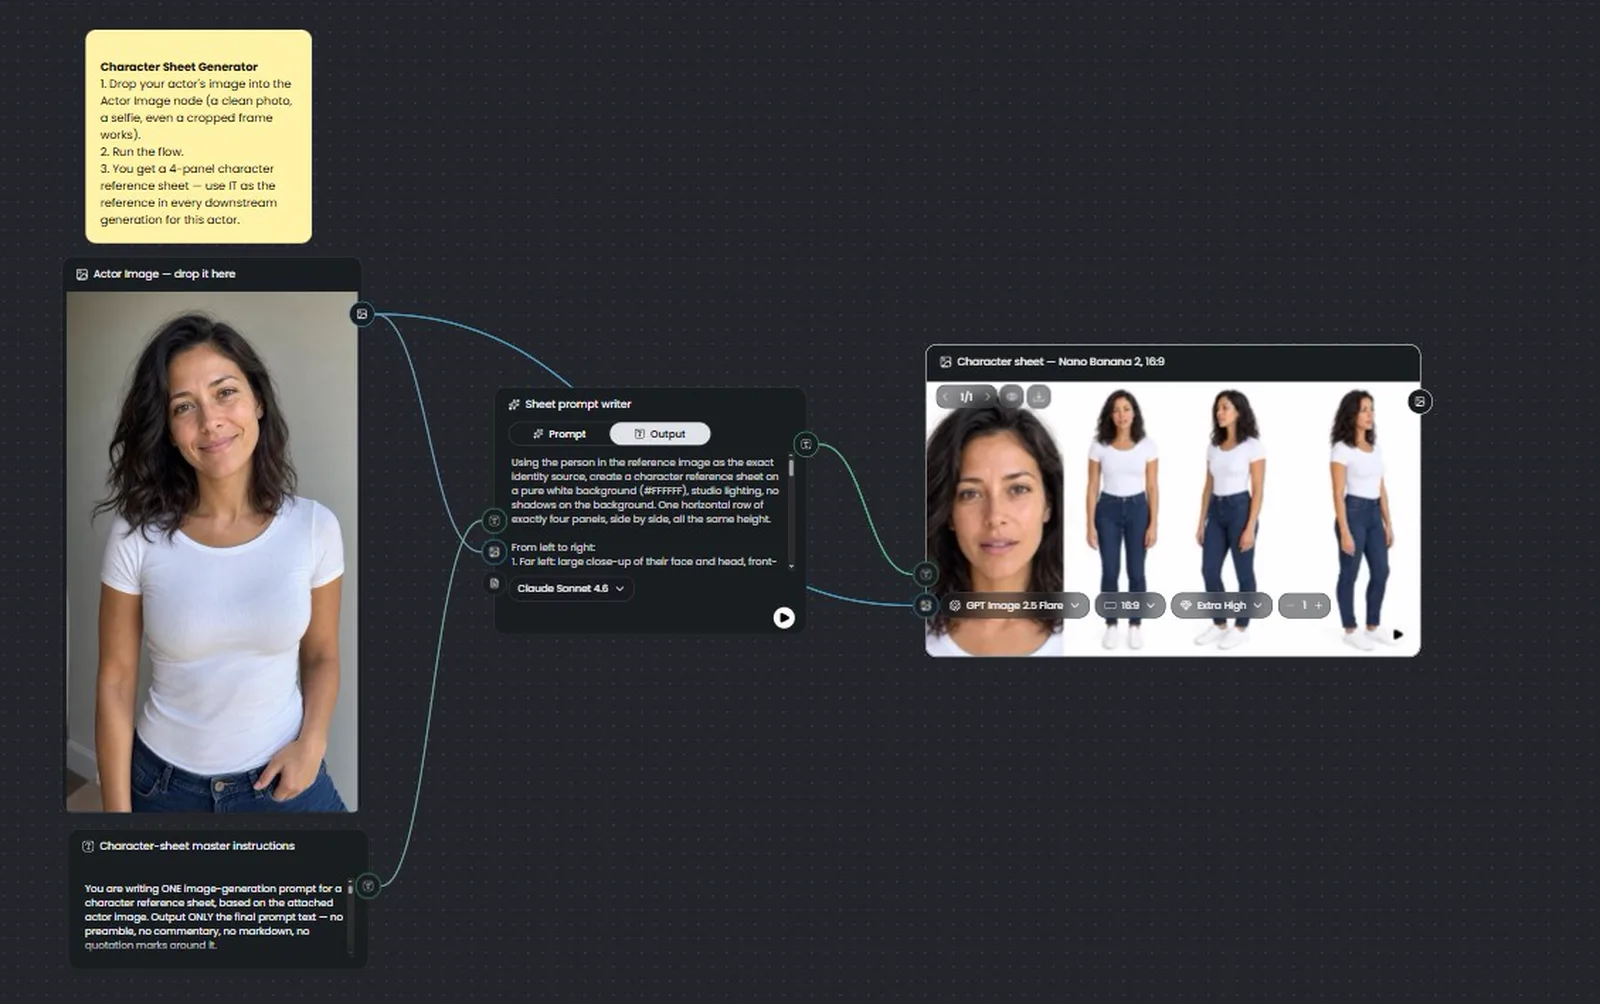
You can run all of this manually using the UI or the workflow canvas, or you can use it directly with the MCP inside Claude, using a fine-tuned skill that was built especially for this purpose.
With the skill, you drop the actor’s photo and Claude analyzes the face, hair, and outfit, fills the prompt slots for you, and generates the sheet through the Maxfusion AI MCP without leaving the chat.
There is also an already made canvas workflow. You drop the actor’s image into the input node, run it, and get the character sheet back.
" height="57.25593113035147px" id="pFbN4t6nI" transform="translate(73 0)" width="138.9190010986328px"/><path d="M 58.958 24.529 L 67.611 12.149 L 59.372 0.274 L 64.067 0.274 L 70.234 9.479 L 76.217 0.274 L 80.774 0.274 L 72.58 12.287 L 81.37 24.529 L 76.723 24.529 L 70.003 15.279 L 63.375 24.529 L 58.957 24.529 Z M 44.566 24.809 C 43.479 24.811 42.396 24.671 41.345 24.394 C 40.359 24.1 39.426 23.649 38.583 23.059 C 37.789 22.45 37.131 21.682 36.65 20.804 C 36.19 19.884 35.96 18.824 35.96 17.628 C 35.96 16.248 36.205 15.082 36.696 14.13 C 37.218 13.18 37.908 12.427 38.768 11.875 C 39.627 11.323 40.624 10.924 41.759 10.679 C 42.924 10.43 44.112 10.306 45.303 10.31 L 52.437 10.31 C 52.437 8.93 52.237 7.733 51.838 6.72 C 51.47 5.708 50.857 4.926 49.998 4.373 C 49.138 3.79 48.003 3.499 46.592 3.499 C 45.786 3.493 44.982 3.585 44.198 3.775 C 43.462 3.959 42.833 4.251 42.311 4.649 C 41.79 5.049 41.406 5.585 41.161 6.26 L 36.972 6.26 C 37.187 5.156 37.602 4.22 38.215 3.453 C 38.848 2.664 39.63 2.008 40.516 1.52 C 41.436 0.998 42.419 0.615 43.462 0.37 C 44.487 0.126 45.538 0.002 46.592 0 C 50.09 0 52.575 1.029 54.048 3.085 C 55.52 5.14 56.257 7.917 56.257 11.415 L 56.257 24.532 L 52.989 24.532 L 52.759 21.448 C 52.084 22.368 51.271 23.075 50.319 23.565 C 49.397 24.047 48.402 24.373 47.374 24.532 C 46.449 24.711 45.509 24.803 44.566 24.808 Z M 44.935 21.356 C 46.469 21.356 47.788 21.111 48.893 20.62 C 50.028 20.098 50.903 19.347 51.516 18.365 C 52.13 17.383 52.436 16.186 52.436 14.775 L 52.436 13.578 L 48.156 13.578 C 47.144 13.578 46.146 13.593 45.165 13.624 C 44.183 13.654 43.293 13.778 42.495 13.992 C 41.698 14.207 41.053 14.575 40.562 15.097 C 40.102 15.618 39.872 16.37 39.872 17.352 C 39.872 18.272 40.102 19.024 40.562 19.607 C 41.053 20.19 41.682 20.635 42.449 20.942 C 43.249 21.218 44.089 21.358 44.935 21.356 Z M 0 24.532 L 0 0.277 L 3.774 0.277 L 3.958 3.177 C 4.48 2.44 5.063 1.842 5.707 1.382 C 6.381 0.922 7.128 0.58 7.917 0.369 C 8.769 0.12 9.652 -0.004 10.54 0.001 C 12.227 0.001 13.593 0.369 14.636 1.105 C 15.669 1.799 16.483 2.773 16.983 3.913 C 17.505 3.119 18.141 2.405 18.87 1.796 C 19.602 1.216 20.427 0.764 21.31 0.461 C 22.23 0.154 23.242 0.001 24.347 0.001 C 26.127 0.001 27.553 0.384 28.627 1.151 C 29.732 1.919 30.53 2.961 31.02 4.281 C 31.511 5.57 31.757 7.027 31.757 8.653 L 31.757 24.532 L 27.845 24.532 L 27.845 10.632 C 27.845 9.835 27.799 9.022 27.707 8.193 C 27.654 7.4 27.467 6.622 27.154 5.892 C 26.848 5.156 26.387 4.572 25.774 4.143 C 25.191 3.683 24.362 3.453 23.288 3.453 C 22.276 3.453 21.417 3.698 20.711 4.189 C 20.036 4.649 19.484 5.279 19.054 6.076 C 18.621 6.885 18.311 7.754 18.134 8.654 C 17.95 9.544 17.858 10.434 17.858 11.323 L 17.858 24.532 L 13.945 24.532 L 13.945 10.586 C 13.945 9.819 13.899 9.022 13.807 8.193 C 13.755 7.405 13.584 6.629 13.301 5.892 C 13.076 5.183 12.623 4.568 12.012 4.143 C 11.429 3.683 10.616 3.453 9.573 3.453 C 8.1 3.453 6.95 3.883 6.121 4.741 C 5.293 5.57 4.71 6.598 4.372 7.825 C 4.07 8.982 3.916 10.173 3.912 11.369 L 3.912 24.532 Z" fill="rgb(21, 22, 27)" height="24.80901853219235px" id="Dy5HPNSvH" transform="translate(0 18.5)" width="81.37000073242189px"/></g></svg>)
" height="32px" id="VmykzZzNe" width="32px"/></svg>)
" height="30.633213969252477px" id="w5KefWMGh" transform="translate(0 1)" width="32px"/></svg>)
" height="32px" id="KxxfrbxU7" width="32px"/></g></svg>)
" height="22.41686631528509px" id="wfz7J8dwQ" transform="translate(0 5)" width="32px"/></svg>)
" height="57.25593113035147px" id="ZNNxR3481" transform="translate(73 0)" width="138.9190010986328px"/><path d="M 58.958 24.529 L 67.611 12.149 L 59.372 0.274 L 64.067 0.274 L 70.234 9.479 L 76.217 0.274 L 80.774 0.274 L 72.58 12.287 L 81.37 24.529 L 76.723 24.529 L 70.003 15.279 L 63.375 24.529 L 58.957 24.529 Z M 44.566 24.809 C 43.479 24.811 42.396 24.671 41.345 24.394 C 40.359 24.1 39.426 23.649 38.583 23.059 C 37.789 22.45 37.131 21.682 36.65 20.804 C 36.19 19.884 35.96 18.824 35.96 17.628 C 35.96 16.248 36.205 15.082 36.696 14.13 C 37.218 13.18 37.908 12.427 38.768 11.875 C 39.627 11.323 40.624 10.924 41.759 10.679 C 42.924 10.43 44.112 10.306 45.303 10.31 L 52.437 10.31 C 52.437 8.93 52.237 7.733 51.838 6.72 C 51.47 5.708 50.857 4.926 49.998 4.373 C 49.138 3.79 48.003 3.499 46.592 3.499 C 45.786 3.493 44.982 3.585 44.198 3.775 C 43.462 3.959 42.833 4.251 42.311 4.649 C 41.79 5.049 41.406 5.585 41.161 6.26 L 36.972 6.26 C 37.187 5.156 37.602 4.22 38.215 3.453 C 38.848 2.664 39.63 2.008 40.516 1.52 C 41.436 0.998 42.419 0.615 43.462 0.37 C 44.487 0.126 45.538 0.002 46.592 0 C 50.09 0 52.575 1.029 54.048 3.085 C 55.52 5.14 56.257 7.917 56.257 11.415 L 56.257 24.532 L 52.989 24.532 L 52.759 21.448 C 52.084 22.368 51.271 23.075 50.319 23.565 C 49.397 24.047 48.402 24.373 47.374 24.532 C 46.449 24.711 45.509 24.803 44.566 24.808 Z M 44.935 21.356 C 46.469 21.356 47.788 21.111 48.893 20.62 C 50.028 20.098 50.903 19.347 51.516 18.365 C 52.13 17.383 52.436 16.186 52.436 14.775 L 52.436 13.578 L 48.156 13.578 C 47.144 13.578 46.146 13.593 45.165 13.624 C 44.183 13.654 43.293 13.778 42.495 13.992 C 41.698 14.207 41.053 14.575 40.562 15.097 C 40.102 15.618 39.872 16.37 39.872 17.352 C 39.872 18.272 40.102 19.024 40.562 19.607 C 41.053 20.19 41.682 20.635 42.449 20.942 C 43.249 21.218 44.089 21.358 44.935 21.356 Z M 0 24.532 L 0 0.277 L 3.774 0.277 L 3.958 3.177 C 4.48 2.44 5.063 1.842 5.707 1.382 C 6.381 0.922 7.128 0.58 7.917 0.369 C 8.769 0.12 9.652 -0.004 10.54 0.001 C 12.227 0.001 13.593 0.369 14.636 1.105 C 15.669 1.799 16.483 2.773 16.983 3.913 C 17.505 3.119 18.141 2.405 18.87 1.796 C 19.602 1.216 20.427 0.764 21.31 0.461 C 22.23 0.154 23.242 0.001 24.347 0.001 C 26.127 0.001 27.553 0.384 28.627 1.151 C 29.732 1.919 30.53 2.961 31.02 4.281 C 31.511 5.57 31.757 7.027 31.757 8.653 L 31.757 24.532 L 27.845 24.532 L 27.845 10.632 C 27.845 9.835 27.799 9.022 27.707 8.193 C 27.654 7.4 27.467 6.622 27.154 5.892 C 26.848 5.156 26.387 4.572 25.774 4.143 C 25.191 3.683 24.362 3.453 23.288 3.453 C 22.276 3.453 21.417 3.698 20.711 4.189 C 20.036 4.649 19.484 5.279 19.054 6.076 C 18.621 6.885 18.311 7.754 18.134 8.654 C 17.95 9.544 17.858 10.434 17.858 11.323 L 17.858 24.532 L 13.945 24.532 L 13.945 10.586 C 13.945 9.819 13.899 9.022 13.807 8.193 C 13.755 7.405 13.584 6.629 13.301 5.892 C 13.076 5.183 12.623 4.568 12.012 4.143 C 11.429 3.683 10.616 3.453 9.573 3.453 C 8.1 3.453 6.95 3.883 6.121 4.741 C 5.293 5.57 4.71 6.598 4.372 7.825 C 4.07 8.982 3.916 10.173 3.912 11.369 L 3.912 24.532 Z" fill="rgb(41, 42, 47)" height="24.80901853219235px" id="MB0beBzDo" transform="translate(0 18.5)" width="81.37000073242189px"/></g></svg>)